
Switch to: Solar PV
-
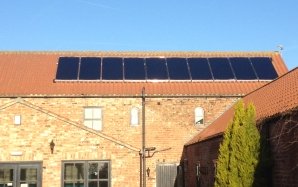
Solar Thermal Installation
This guide is intended to provide an introduction to the Solar Thermal installation process. The example below refers to a small scale domestic installation but the method can be applied to any domestic or commercial property. A sheet metal / corrugated roof installation will be somewhat different in fixing to those of tile or slate, but the general steps will be the same.
For finished examples have a look at our Case Studies.
-
Scaffold
For each job we undertake scaffolding is erected to the highest health and safety standards. As scaffolding is the only sub-contracted aspect of our company we take care and consideration in ensuring we only use companies that are compliant with both the Contractors Health and Safety Assessment Scheme (CHAS) and the National Access and Scaffolding Confederation (NASC).
Depending on the expected length of the job we will arrange for the erection of scaffolding either before or during the morning of the first working day. The cost of the scaffold will be included in our installation quote (except in unusual circumstances).
We insist that scaffolding is erected to reach up to the eaves of a roof and ensure the safety of those working on the roof with compliance to all relevant Health and Safety Codes. In some cases additional safety measures such as netting will also be required and again, the cost of complying with the safety needs on site will be incorporated into our quote. -
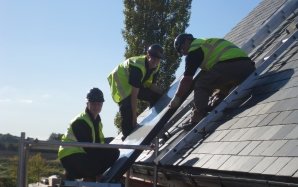
Positioning the Roof Anchors
Similar to solar photovoltaic installs, a site survey is performed before any install. The thermal collector position is marked out accurately on the roof with chalk which washes off with rain.
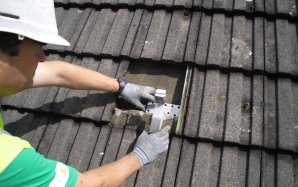
Roof anchors are positioned carefully on the roof to ensure the thermal collectors can be installed correctly. The location of the rafters under the existing roof tiles is identified. The anchors are then placed on top of the tiles where they will eventually be positioned while measurements are taken to ensure that the aluminium frame will sit ‘straight’.
Once the position of the anchors is determined they can be fixed to the roof. One roof tile is removed to allow the anchor to be screwed to the rafter and then replaced to ensure the roof remains water tight. It is important that the correct type of anchor is used. This will be determined during the site survey. -
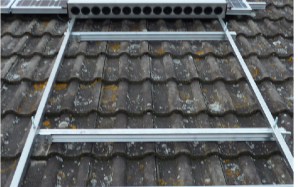
Attaching the Frame
Once all the roof anchors are fixed into place, the aluminium mounting rails that make up the frame are then locked into the anchors and screwed into place. Each rail is checked to make sure that it is straight and that all the rails are parallel to each other. This is the single most important step in ensuring that the panels will look correct.
-
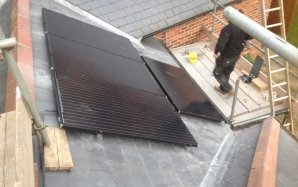
Installing the Thermal Collectors
With the mounting rails in place, the frame is complete and the panels can be attached and clamped to the frame. A minimum of 4 clamps is used per collector, though in some cases extra clamps are used to aid the parallel alignment of the rows.
In order to have a horizontal or vertical mounting orientation, the collector type must be specified before install. -
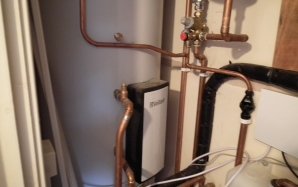
Cylinder Installation
If a solar twin coil cylinder is not currently installed it will most commonly have to be replaced (except in the case of combi-boilers in which an additional external cylinder would be installed). A solar cylinder is much larger than a common domestic cylinder and will need a high storage cupboard or area.
In the case that a cylinder does need to be installed the current cylinder would be isolated, drained and replaced with a twin coil cylinder which would need to be plumbed in. An immersion heater is also installed in the cylinder under MCS guidelines. -
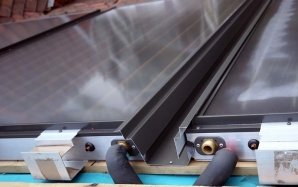
Connecting the Modules
The solar thermal collectors are then connected together using specially designed connector pipes and an insulated tubing called metalflex are connected at both the flow and return points of the array connecting the panels to a pumping station.
-
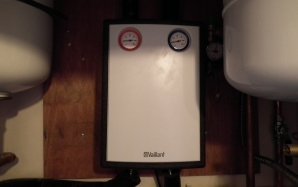
Pumping station
The metalflex piping is then taken through the roof in a carefully made incision which is later sealed and flashed to ensure it is watertight. The tubing is then run through into the loft down to the pumping station at the customer’s discretion to avoid any visible pipe work. This is then connected to the flow and return points of the pump station. The Metalflex piping is then connected from the pump station to the designated solar thermal coil at the point of the cylinder again on the flow and return making a full loop between the cylinder, pump station and solar thermal collectors.
The role of the pump station in the installation is to circulate the warm fluid from the collectors on the roof down to the cylinder where heat can then be transferred from the thermal coil into the water contained within using a completely sealed system. This fluid is them pumped back around the system to continue the cycle. -
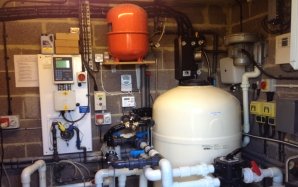
Filling and Expansion
As a solar thermal circuit is an unvented pressurised system an expansion vessel must also be installed to allow the glycol antifreeze solution which circulates around the system to expand with heat safely. A discharge container is also installed in connection with a pressure relief valve as another safety mechanism which allows the system to be safely drained down if the glycol needs to be replaced or any maintenance work needs to be carried out.
After these elements of the system have been installed and have been checked to ensure it is connected properly with no possibility of leaks, the flow rate is set on the pump station and the system is filled with the glycol antifreeze solution and pressurised. -
Final Stages
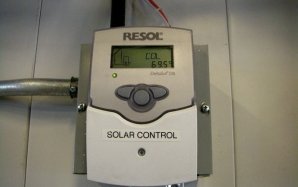
A Resol solar controller is integrated into the pump station in conjunction with three temperature sensor probes in which one is located on the solar array on the roof, one is in the bottom of the cylinder where solar thermal heat is added and the last one is located in the warmer top half of the cylinder from which hot water is drawn off. In the case of a split roof installation an additional temperature sensor would be added to the roof on the second array.
The controller is then programmed by a heating engineer to work on a temperature differential with the roof making the system more efficient. This is to avoid the system pumping cold water on cold days from the collectors into the cylinder or in the case of a split system prevents the cooler collectors on a different orientation lowering the efficiency of the whole system and its heat transfer. -
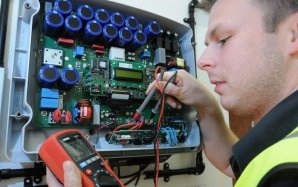
Commissioning
The system is finally completely checked by both a heating engineer and a NICEIC approved electrician to ensure optimum performance before the system is handed over to the customer. On the day of commissioning the customer is also trained up on their system and how to use the solar thermal heat to its full potential.
